Frontera Body Lift Part 3 – Fitting the Body Spacers
The day had come to actually do the lift, did the usual precaution of removing the battery (just in case) and then started on the lift.
Then in no particular order
- Removed front bumper
- Slackened hose clips on fuel tank filler and breather pipes
- Removed door sill trims, front kick panels and seat belt anchors so the carpet could be pulled back to get to the body bolts
- Removed the radiator fan shroud
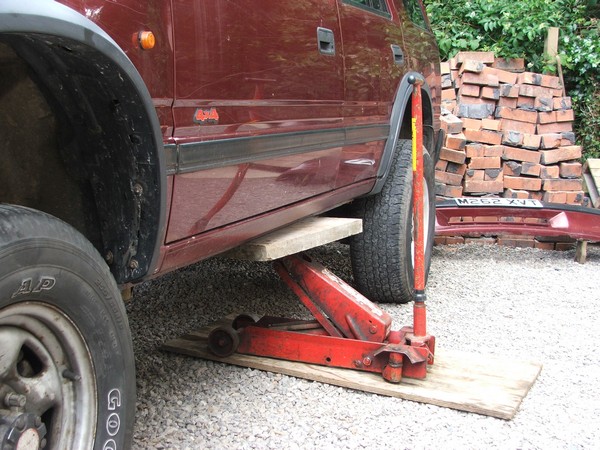
Then it was time to start on the body mounting bolts. Working on one side at a time, all 6 mounting bolts were removed. A piece of timber (4″ x 2″) was placed along the underneath of the sill so that the body could be jacked up without any damage

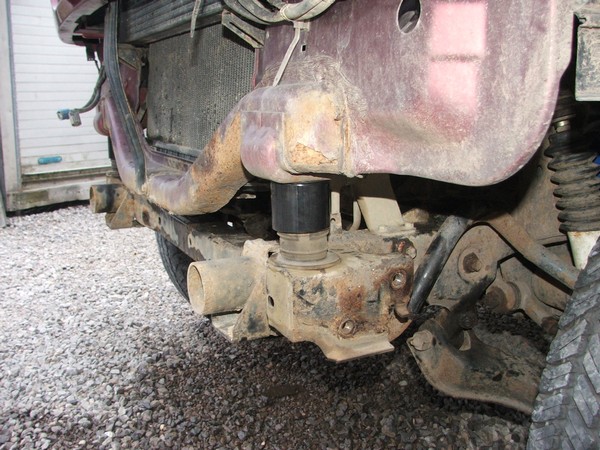
The body was lifted just enough so the rubber mounting bushes could be removed. These were then checked over to make sure they were servicable and given a quick wash to clean off all the mud and other crud picked up over the years. Also cleaned up the spacer tubes ready for refitting.
All of the body mounts were reused and then the spacer block placed on top of the rubber mounts and the new longer bolts fitted, body was lowered and then did a quick check to make sure that all of the spacers and mounts were sitting properly and the body mounting bolts tightened up. Once the first side was completed, the other side was tackled.
After all the spacers were fitted and bolted up tight, carpets, seat belt mounts, kick panels and sill trims were replaced.

Next up was to check all the fuel lines, brake pipes, radiator hoses, intercooler pipes, PAS pipes etc to make sure nothing was stretched. Apart from loosening a few hose clips and realinging the pipes for the radiator, fuel tank and intercooler everything fitted, nothing needed extending or modifying.
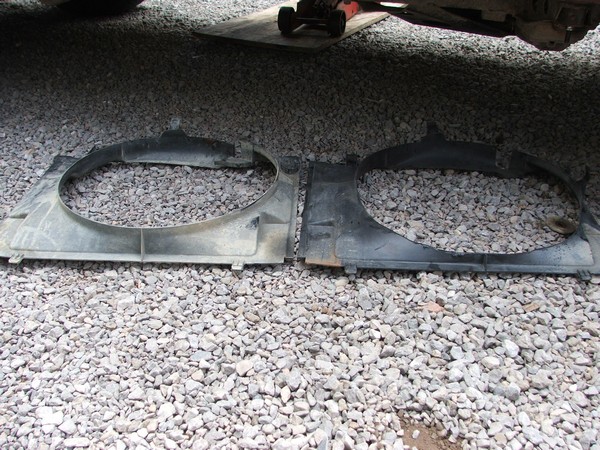
The cooling fan shroud however did. As the radiator is mounted on the body, lifting the body also lifts the radiator which meant the fan shroud was now too close to the fan and fouled. Quite an easy fix, trimmed back the lower edge of the shroud so it cleared and then refitted it

No comments yet.
-
Recent
- Broken Steering
- Frontera Steering Damper
- Wheel Balancing
- Rear Bumper MKII – Its now tubular
- 80mm Body Lift
- Frontera Recovery Bumper
- Frontera Body Lift Part 5 – Rear Bumper
- Frontera Body Lift Part 4 – Front Bumper
- Frontera Body Lift Part 3 – Fitting the Body Spacers
- Frontera Body Lift Part 2 – Preparation
- Frontera Body Lift Part 1 – Research
- Introducing My Truck
-
Links
-
Archives
- October 2011 (1)
- July 2011 (2)
- March 2010 (2)
- October 2009 (1)
- July 2009 (3)
- May 2009 (3)
- October 2007 (1)
-
Categories
-
RSS
Entries RSS
Comments RSS
Leave a comment